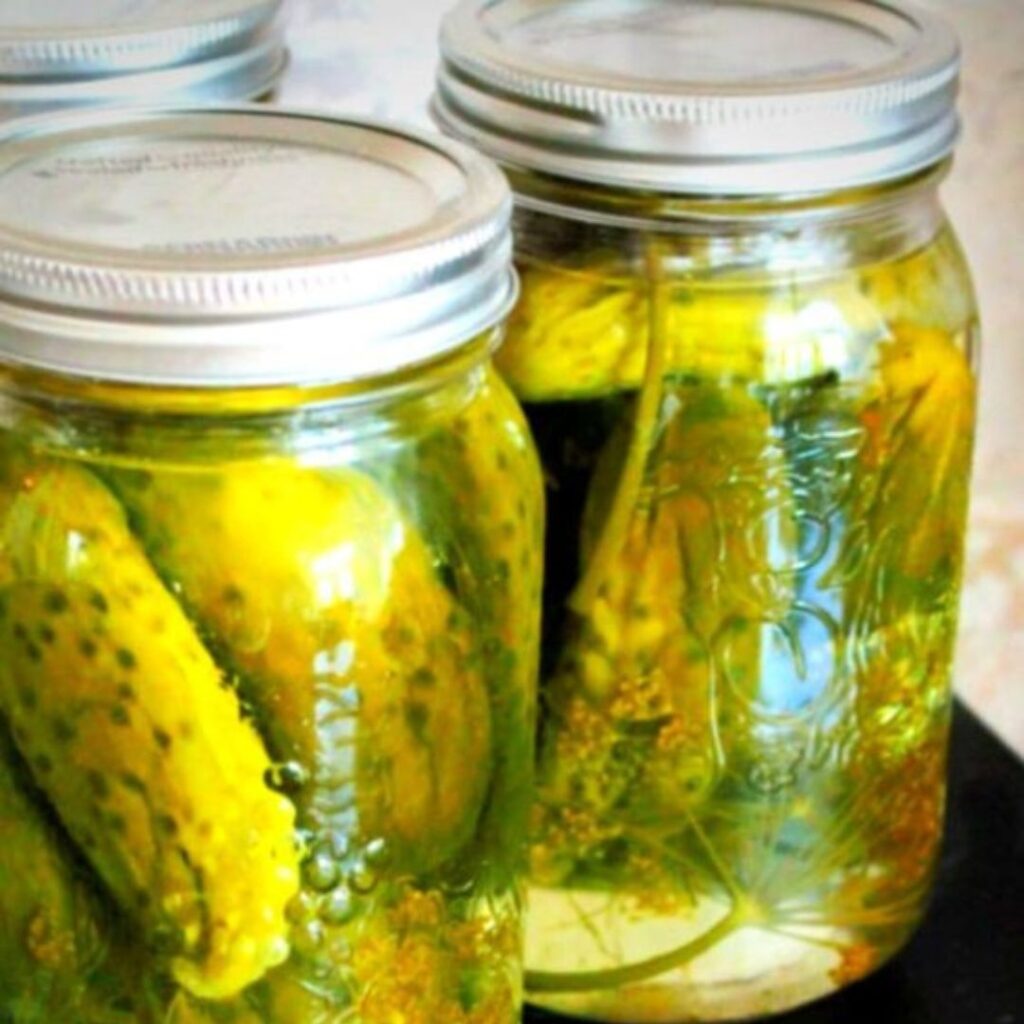
Homemade garlic dill pickles are a crunchy, tangy, and flavorful addition to any meal. They are surprisingly easy to make and taste much better than store-bought pickles. Enjoy these pickles on sandwiches, burgers, or as a delicious snack straight from the jar! 🥒
Ingredients
- 6-8 small cucumbers (pickling cucumbers work best)
- 4 cups water
- 2 cups white vinegar
- 1/4 cup pickling salt
- 6-8 cloves garlic, peeled
- 2 tablespoons dill seeds or 4-6 sprigs fresh dill
- 1 tablespoon black peppercorns
- 1 tablespoon mustard seeds
- 1 teaspoon red pepper flakes (optional, for a spicy kick)
- 4-6 bay leaves
Instructions
- Prepare the Cucumbers:
- Wash the cucumbers thoroughly and trim the ends. If you prefer, you can slice them into spears or rounds, or leave them whole.
- Sterilize the Jars:
- Sterilize your canning jars and lids by boiling them in water for at least 10 minutes. Keep them warm until ready to use.
- Make the Brine:
- In a large pot, combine the water, white vinegar, and pickling salt. Bring the mixture to a boil, stirring until the salt is fully dissolved. Remove from heat and let it cool slightly.
- Pack the Jars:
- Place 1-2 cloves of garlic, 1 teaspoon of dill seeds (or 1 sprig of fresh dill), 1/2 teaspoon of black peppercorns, 1/2 teaspoon of mustard seeds, and a pinch of red pepper flakes (if using) into each sterilized jar. Add a bay leaf to each jar.
- Pack the cucumbers tightly into the jars, leaving about 1/2 inch of headspace at the top.
- Add the Brine:
- Pour the hot brine over the cucumbers in each jar, ensuring the cucumbers are fully submerged. Leave about 1/2 inch of headspace. Remove any air bubbles by gently tapping the jars and adjusting the cucumbers if needed.
- Seal the Jars:
- Wipe the rims of the jars clean with a damp cloth. Place the sterilized lids on top and screw on the bands until fingertip tight.
- Process the Jars:
- If you are planning to store the pickles for an extended period, process the jars in a boiling water bath for 10 minutes. Make sure the jars are fully submerged and covered by at least 1 inch of water. Start timing when the water reaches a full boil.
- Remove the jars from the water bath and let them cool completely on a towel or rack. You should hear the lids pop as they seal.
- Store and Enjoy:
- Once the jars are cool, check the seals by pressing the center of each lid. If the lid does not flex up and down, it is sealed properly. Store the sealed jars in a cool, dark place for at least 2 weeks before opening to allow the flavors to develop. Unsealed jars should be refrigerated and used within a few weeks.
Tips for the Best Garlic Dill Pickles
- Fresh Ingredients: Use fresh, firm cucumbers and quality garlic and dill for the best flavor.
- Adjusting Flavors: Feel free to adjust the amount of garlic, dill, and spices to suit your taste preferences.
- Crispy Pickles: For extra crispy pickles, you can add a few grape leaves or a pinch of alum to each jar before adding the brine.
A tasty and simple method to preserve cucumbers and enjoy a crunchy, tangy delight is with homemade garlic dill pickles. You can make pickles that are considerably better than those you buy at the store with just a few basic ingredients and a little perseverance. Savor these pickles with burgers, sandwiches, or right out of the jar! 🥒